Before and after
Compare the placement and contrast, then use the steps below to try the idea.
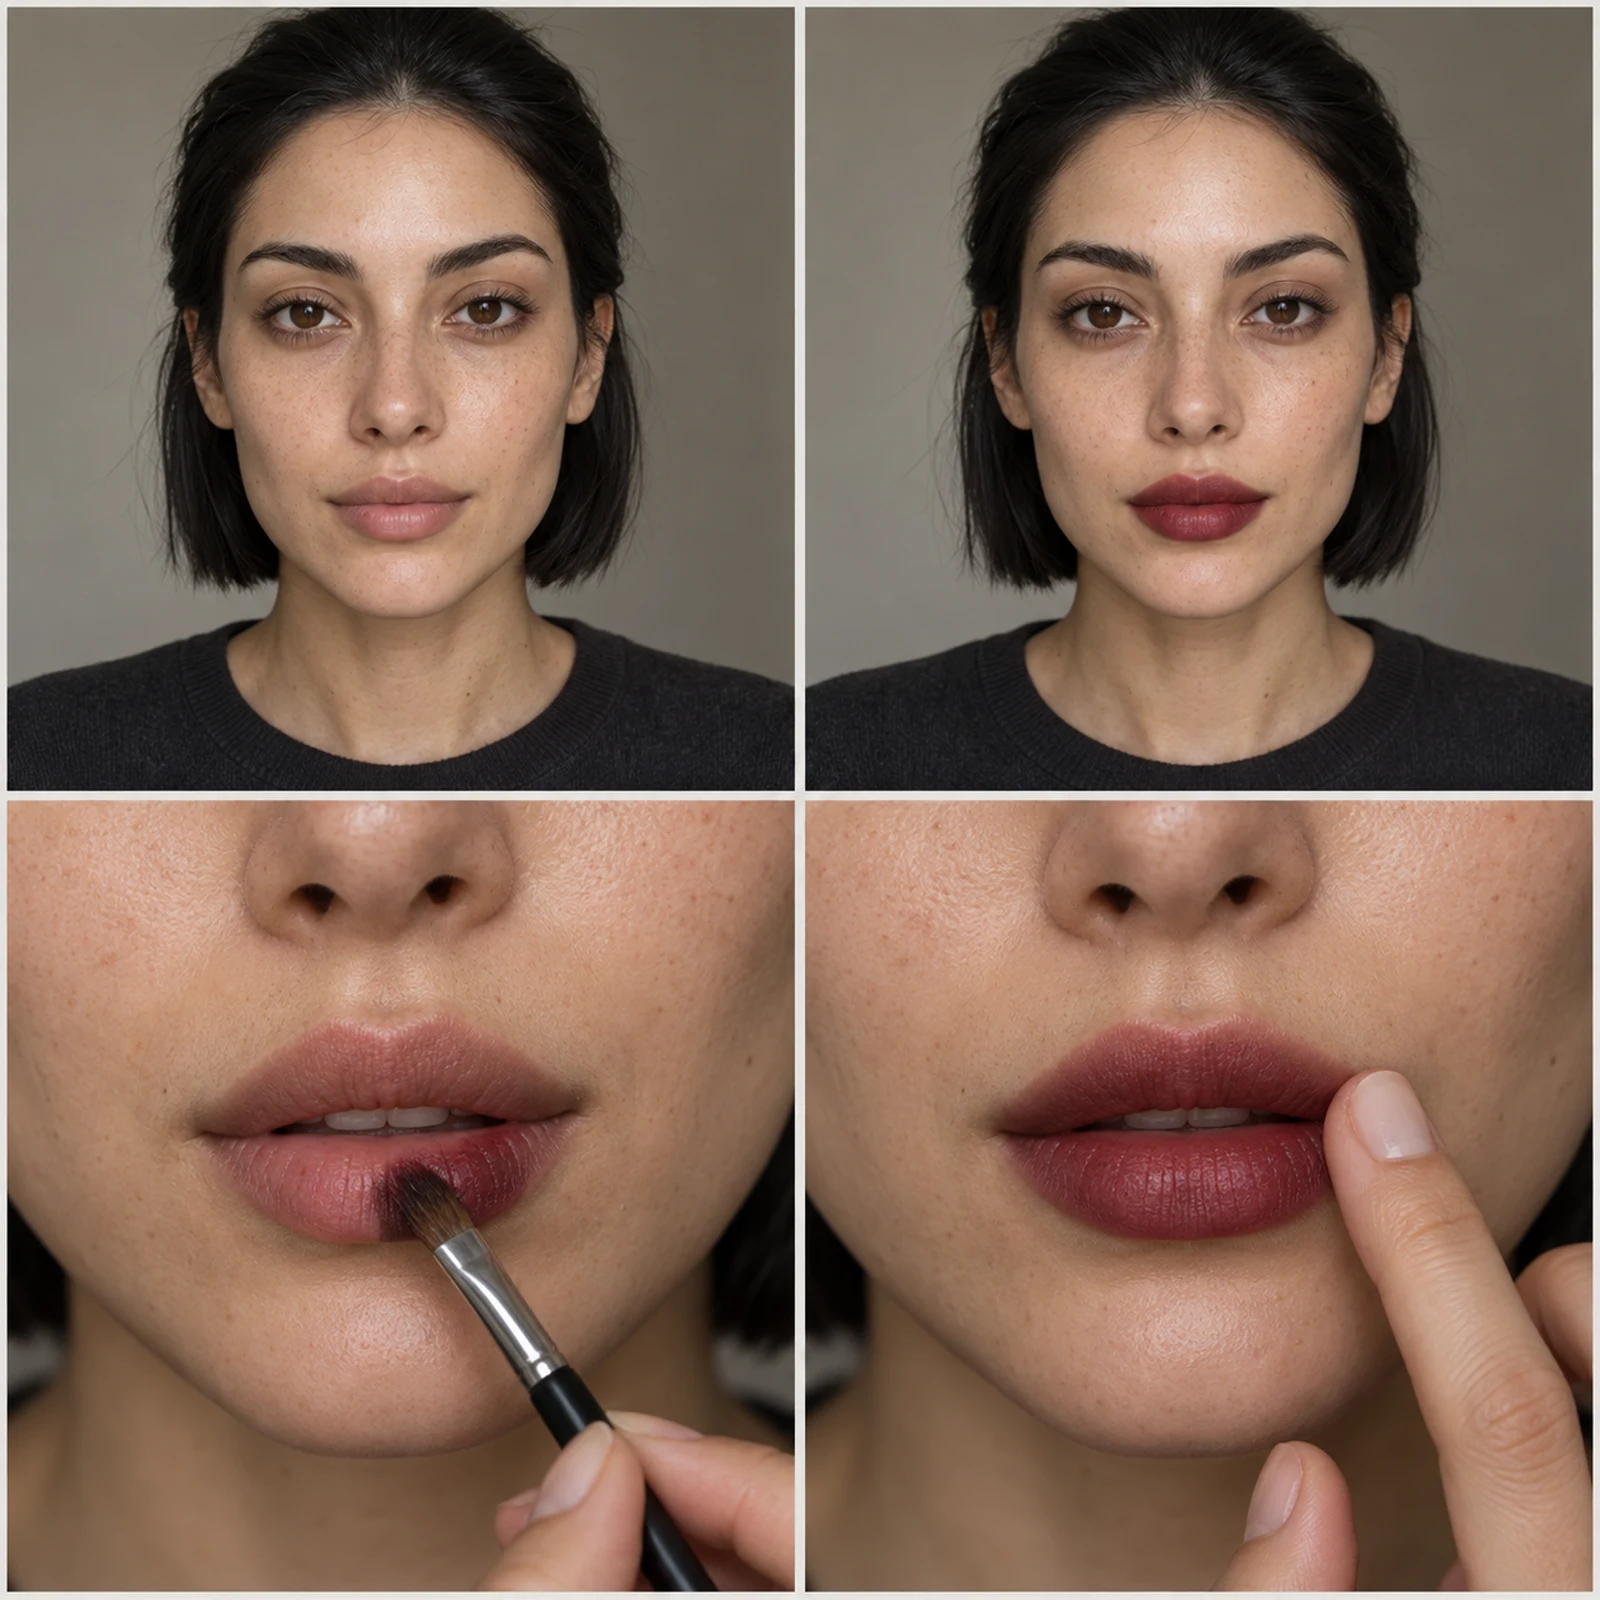
AI illustrations of a fictional model, not photographs of a product test. Use them as a colour and placement reference; your result will vary.
What you need
Burgundy lipstick, a small lip brush, a tissue and a clean cotton bud. A matte or satin lipstick can be pressed on thinly; you do not need a separate lip stain.
Keep your usual base routine. This tutorial focuses on the lips.
The technique, up close
AI placement examples. The pictures illustrate the two key movements; follow the written steps and the directions on your own products.
- Blot away excess balmStart with comfortable lips. Remove slippery excess so the colour does not slide while you blend.
- Place colour in the centreUse a small lip brush to press one thin layer of burgundy onto the middle of each lip. Leave a narrow bare margin.
- Tap toward the edgeWith a clean fingertip, make small tapping movements from the coloured centre toward the natural border. Do not drag beyond it.
- Build depth selectivelyAdd a second small touch in the centre if the first layer looks too sheer. Keep the perimeter softer than the middle.
- Check the mouth relaxedRelax your lips and check both corners. Clean any mark outside the natural edge with a clean cotton bud.
When to stop
The colour is darkest where your lips meet and fades toward a soft, tidy border. In the example, the lip carries the contrast while the eyes stay understated.
If it goes too far
If one edge gets too wide, lift the excess with a clean cotton bud, then tap the remaining colour inward. Rebuild the centre after the edge looks tidy.
A mistake to avoid
A wide blurred halo around the mouth can look accidental. Keep the fade inside the natural lip border.
Make it work for your day
A lighter version
Press on one layer, blot once and stop before adding the darker second layer.
Finish the rest of the face
Keep your usual base, brush the brows and add a light coat of mascara if you like. Leave extra cheek and eye colour out until you have checked the lip in daylight.
Adapt the colour and placement
On deeper lips, choose a burgundy that remains visibly red rather than disappearing into the natural lip colour. If you prefer less contrast, stop after one pressed layer.
Products to consider
Check your own makeup first. A product you already own in the right colour and labelled for the intended area may be enough.
MACximal Silky Matte Lipstick: Diva
An intense reddish burgundy option for the dark centre. Apply lightly for the diffused effect; the AI image is not a swatch of this lipstick.
Select the named shade and check the product directions before buying.
View the brand’s product details
These are editorial links to brand pages, not affiliate links. Product names and shade descriptions were reviewed against accessible brand information on October 31, 2026. Live stock has not been checked. Tressaly has not physically tested these products. AI images are not product swatches. Stock, regional availability and ingredients may change.
The community starting point
We move the plum mood and dark-lip contrast into a burgundy lip tutorial. Here, the darker colour stays at the lip centre with a softer edge.
Read the original discussion: My plum autumn makeup with a very amateurish step by step; Makeup today: a grungy eye and brown lip.
Sources reviewed October 31, 2026. These are selected public discussions, not a platform-wide trend ranking. We link the creators’ work; their photos are not reproduced here.
Questions
How can I blur dark lipstick without overlining?
Leave a small uncoloured margin at first, then tap colour outward until it meets the natural border. Remove any colour beyond it before adding another layer.
How can I make this look more subtle?
Press on one layer, blot once and stop before adding the darker second layer.
What can I do if I apply too much colour?
If one edge gets too wide, lift the excess with a clean cotton bud, then tap the remaining colour inward. Rebuild the centre after the edge looks tidy.
Try the idea on your own face
Your sign supplies a prompt, not an analysis of your features. Tressaly’s selfie preview is designed around your own photo. See how a read works.
Read next: More on placement and choosing a look. Earlier issue: Aries, October 26 to November 1.